
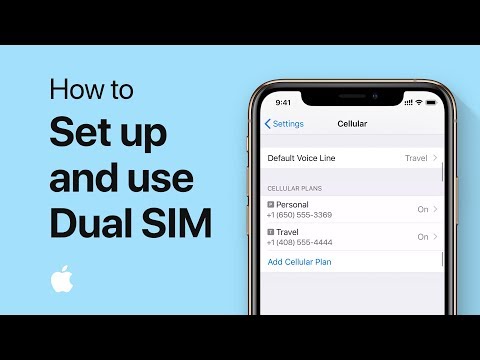
How to set up and use Dual SIM — Apple Support
Today, I’m going to clear any and all doubts you may have regarding how to set up and use dual SIM in an iPhone.
The thing here is that sometimes a single mobile number may not be enough – if you go to a different country, for example, or need a business number AND a personal number, then two phone numbers are way better than just the one.
When it comes to Apple’s iPhone, it was almost impossible to use a secondary SIM card and that was the case until a few years back. Now, there are a few improvements that permit a second physical line of service on the iPhone.
Unfortunately, this applies only to those handsets that are sold within China, Hong Kong and Macau. For the rest of the world, and only if you have the latest iPhone, you’re able to use two SIM cards; a physical nano-SIM and an e-SIM.
Let’s get into how you can set up and use dual SIM with your Apple iPhone.
How to Set Up and Use Dual SIM — Apple Support
Apple has now made it possible for you to use two separate mobile numbers on a single iPhone. While this is the talk of the town, not all the iPhone’s support this feature as it is restricted only to those iPhone models released post the iPhone XR.
These iPhones come with something called an e-SIM that acts as a secondary carrier allowing you to toggle between two numbers while sending out text messages or making phone calls.
While there are a few who have already activated this feature (simply because it’s so convenient), there are some who still don’t know that this exists.
Let me break it down for you by taking you through certain topics that will clear any and all your doubts pertaining to setting up and using dual SIM in an Apple iPhone.
What is Dual SIM?
Dual SIM refers to the ability to use two SIM cards in a single smartphone. With iPhones sold in countries like Hong Kong or China, you’re able to add two physical nano-SIM cards in your iPhone and have two network carriers at your service.
On the other hand, with countries apart from those mentioned above, Apple has provided you with the ability to use a single physical SIM card and an e-SIM in the same phone.
Unlike other smartphone brands, the iPhone comes with an integrated chip that acts as a virtual SIM card. This is available with each network provider and they come with special benefits.
With a Dual SIM connection on your iPhone you can
- Use one number for business related calls and a second for your personal calls.
- Use one SIM for international travel and one only for when you’re at home.
- Have separate data and voice plans.
What are the Prerequisites?
Well, to successfully have a dual-SIM iPhone, there are certain things you must check first, like if your iPhone supports the feature and if your network provider supports e-SIMs. Let’s take a look at how you can make a dual SIM work with your iPhone.
- Firstly, your iPhone must have been released post the X series. So, any iPhone that was launched after iPhone X, XS, XR or XS Max will come with the dual-SIM feature. Also, your iOS version will play a key role in enabling the dual SIM feature of that phone, you must run a version of iOS12.1 or later to be eligible to run two numbers.
- Second key thing to keep in mind is that your network provider should support wireless e-SIMs. You will have to reach out to your network provider to see if they service and provide e-SIMs.
- Finally, only if your iPhone is unlocked can you use two SIM cards from two different carriers. Otherwise, both plans will have to be from the same network provider as your first SIM card.
Set Up Your Dual SIM Cellular Plan (Using an e-SIM)
The e-SIM is normally provided by your network provider when you buy your iPhone. You can also avail this service at any point in time by reaching out to them directly. There are a couple of ways by which you can activate and set up your second cellular plan that was provided to you by your carrier.
You can follow one of these steps to have your Dual SIM feature activated in your iPhone.
Scan a QR Code
One of the ways you can enable your e-SIM is by scanning the QR code provided by your carrier.
- Here, all you’d have to do if open the camera app and scan the QR code.
- Once you receive the cellular plan detection notification, tap on it to confirm and have the cellular plan added onto your iPhone.
- There may be a chance that you’re prompted for a confirmation code, enter the number provided by your cellular carrier.
Use the Carrier App
You can follow the old school method of downloading the carriers app from the App Store. Once the app is downloaded, install it and login using your registered mobile number.
You will then be able to purchase and activate the cellular plan for your e-SIM. Only after activating the plan will your eSIM work.
Install an Assigned Cellular Plan
On iPhones running iOS 13 and later, some network carriers may assign your cellular plan by asking you to install a file. You can reach out to your provider for more information on how to get the installation file.
For those who have a plan assigned, you can follow these steps to have it installed.
- Start by opening the notification bar. Here you will notice a notification that states “Carrier Cellular Plan Ready to Be Installed”.
- Tap on the notification to open it.
- Now proceed to the Settings App and tap on the appropriate carrier cellular plan to be installed.
- Finally, tap on continue at the bottom of the display.
Enter your Information Manually
The final way you can set up your e-SIMs cellular plan is by manually entering the information of your plan. You can do that by following the steps laid out below.
- Open the Settings App and tap on Cellular or Mobile Data.
- Tap on the option that states “Add cellular plan”
- Now, tap on “Enter Details Manually” at the bottom of the screen to proceed and save the details once done.
Now that you have an active carrier plan running on your iPhones e-SIM, you can toggle between numbers while messaging or browsing the internet. To do so you will have to open the Settings App and tap on Mobile Data then select which SIM and plan you would like to use.
Point to Note: Only one SIM can be used at a time and you can not use both SIMs simultaneously.
Additional Set Up Options for your iPhone’s Dual SIM

Once you activate the e-SIM on your iPhone you can assign labels to your SIM and even set a default line. Following these steps will allow you to do just that.
- Label Your Plans – When you activate your secondary SIM service, you can label your SIMs. This makes it easier for you to decide which SIM card to use for what.
- For example, you can label SIM 1 as Business if you’re using your primary SIM card only for business related purposes and the second e-SIM can be labeled at Secondary, Travel Personal or Cellular Data depending on what you’re going to use it for.
- Set Your Default Number – With iOS13 and later on the iPhone, you get to decide which number should be your Primary number and which to be your Secondary line or if you’d like then you can choose both numbers. A great point to note here is that if you’re in a no-coverage zone on SIM1 then automatically you’ll be connected to SIM2 so there’s no complete loss of connectivity.
How to Use the Dual SIM Feature on Your iPhone
Once you complete the entire set up process, you’ll be able to use either SIM card to make and receive calls, send and receive text messages and browse the internet.
Here’s how you can use both phone numbers on your iPhone.
Teach your iPhone to Remember which Number to Use

The first thing you must do is teach your iPhone which number to use on priority.
Normally, when you make a phone call, by default your iPhone will choose your primary number or the number you used the last time to call that particular contact. You can even specify which number to use on a certain contact in your phone book.
You can follow these steps to assign a number to a certain contact:
- Start by tapping on the name of the contact from your Phone Book.
- Now, tap on “Preferred cellular plan” (label that you saved earlier)
- Finally tap on the number you wish to use on this contact.
Once you save this page, all your calls to this recipient will be made from the number you saved and you won’t have to select the number every time.
Switch Numbers on your iPhone to Make a Call

You are able to switch your preferred phone number before you make the call. You can follow these steps if you’re trying to reach out to someone in your Favorites list:
- Open the dialer and tap on the info button ‘i’
- Tap on your current phone number and select the secondary number from the following page.
This is a manual method you can follow prior to every call, in case you’re using one SIM for business and the other for personal use.
Switch SIMs while using iMessage and SMS

While using iMessage you can choose which number to use and appropriately send messages across with the right phone number. Before doing so make sure you know which SIM card has your messaging plan or there may be some additional charges.
Here’s how you can switch SIMs in iMessage:
- Start by opening Messages and tap on the New button to start a conversation.
- Now, enter your recipient’s name/number and beneath that, tap on the current phone number (Primary).
- From here tap on the number you wish to use and you’re done.
Change your Cellular Data Number

When it comes to browsing the internet, you can only use one SIM card at a time. To change your cellular data number you can follow these steps:
- Start by opening the Settings App.
- Tap on Mobile Data and then tap on Cellular Data.
- Finally, tap on the number that has an internet plan activated.
On the same page you will find a toggle option labeled “Allow Cellular Data Switching” that will automatically switch between your SIM cards depending on network coverage and availability so there’s no loss in connectivity.
Point to Note: Cellular Data switching will not work if you’re on Data Roaming. You will have to check with your network provider if there are any additional fees if you’re on Data Roaming.
Here are some other things you can do with your e-SIM on your iPhone
Apart from making calls, sending messages and surfing the internet, you can also manage your cellular settings, transfer eSIM cards between iPhones or erase your eSIM all together.
- Manage Cellular Settings – You can change the cellular settings for each of your plans by accessing Mobile Data in the Settings App and set each option appropriately. Once you save these settings, your iPhone will automatically remember which SIM to use.
- Transfer your eSIM to a new iPhone – To have your eSIM transferred to a new iPhone you will have to follow the same steps as listed above under “Set Up Your Dual SIM Cellular Plan (Using an e-SIM)”. Once the plan is activated on your new iPhone it’ll automatically get deleted from your older iPhone.
- Erase your eSIM – You can erase your eSIM number and plan from your iPhone. This can be accessed from the Settings App. Here you will have to tap on Mobile Data and tap one the plan you wish to remove. At the bottom of the page, tap on Remove Cellular Plan and save the settings.
Takeaway
It’s a great idea to have two SIM cards especially if you’re a working class person. It reduces the extra load especially if you have to use two phones simultaneously.
I hope you were able to find this little guide helpful while you’re setting up your dual SIM on your iPhone.
Also Read:
- How To Set Up and Activate your iPhone Pedometer
- What you need to know about Location Sharing on iPhone
- Latest iPhone 12 Clone – Where to Buy?

Tyrone Young is an award-winning author, researcher and the founder of TheMiniBlog. He has been a content marketer for over 10 years and his main goal is to provide readers with quick hacks, guides and reviews on everything Mini. Based out of the UK, Tyrone likes to take long walks on the beach and take care of his two puppies when he’s not busy writing.


